Managing multiple batteries from different camera brands, LED lights, and wireless gear can quickly become chaotic. I searched for a solution but often found setups that were fixed in place, making it difficult to upgrade when new gear was added.
That led me to create a cost-effective solution using an IKEA Skadis pegboard to organize camera and equipment battery chargers. With 3D-printed charger mounts, you can easily reposition or expand the setup as needed, making it flexible for future upgrades.
Another advantage of this system is it uses strong magnets to mount the charger so you can easily remove your chargers. This means you’re not stuck to a fixed charging location and conveniencely dismount it and pack to use on locatnio,
For all the print parts, I use eSun ABS+. It print a bit easier and emits less odour than regular ABS. However, If you find it difficult to print with ABS, you can also try PETG, and it should work well. Based on my experience with other printed pieces on the pegboard, PLA or PLA+ can be a bit fragile and might bend over time, especially for larger prints.
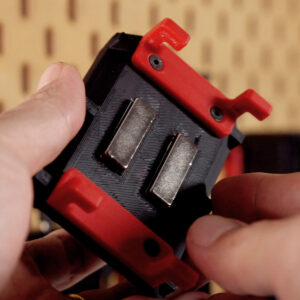
Each holder is designed to use with 4 mm thick neodymium magnets sized 30×10 mm. I use A+B epoxy glue to fix them to the printed parts. Alternatively, for a less permanent solution, 20mm thin double-sided tape can be used.
The printed hooks are securely fastened to the base plate using 8mm M3 screws. If you prefer, you can also use some glue between the hook and the holder to make the connection stronger.
On the charger side, I use a thin self-adhesive metal plate typically used with a magnetic mobile phone holder. These plates come in various sizes and shapes, allowing you to choose the one that matches your charger. Just make sure you properly clean the surface before attached them to the back of the charger.
Generally, the initial design of the magnetic holders worked flawlessly as expected. However, if you intend to use the XTAR SN4 with a larger battery such as the Sony NP-F970. it’s necessary to include extra magnets to provide sufficient support for the additional weight.
The NP-F docking doesn’t include any battery locking slots. The only thing that holds the battery to the charging dock is brass contact pins. When positioned vertically, it won’t be firmly bound to the charger plate. Even though XTAR uses larger brass pins compared to other chargers, there’s still a risk of damage if it’s accidentally pulled forward with force.
Note on XTAR NP-F Battery Docking
Organising the Wiring:
I recommend to use 90-degree angled cable to save some space above the charger. I choose to route the cables in front of the board which is easier to manage or in case I want to move things around.
To make things tidy, I’ve designed a small cable clip that’s simple to use. They will fit 3.5mm – 5mm cables. To use them just find an empty slot and simply twist it in.
If you prefer you can also route the wire behind the board, but keep in mind that the pegboard slots aren’t wide enough for most USB headers to pass through. You’ll need to drill the slot to widen it.
Kim Pimmel has designed a pass-through plug and jig for this and share it on Thingiverse. If you intend to route the cables behind the board free to check it out.
Powering Up:
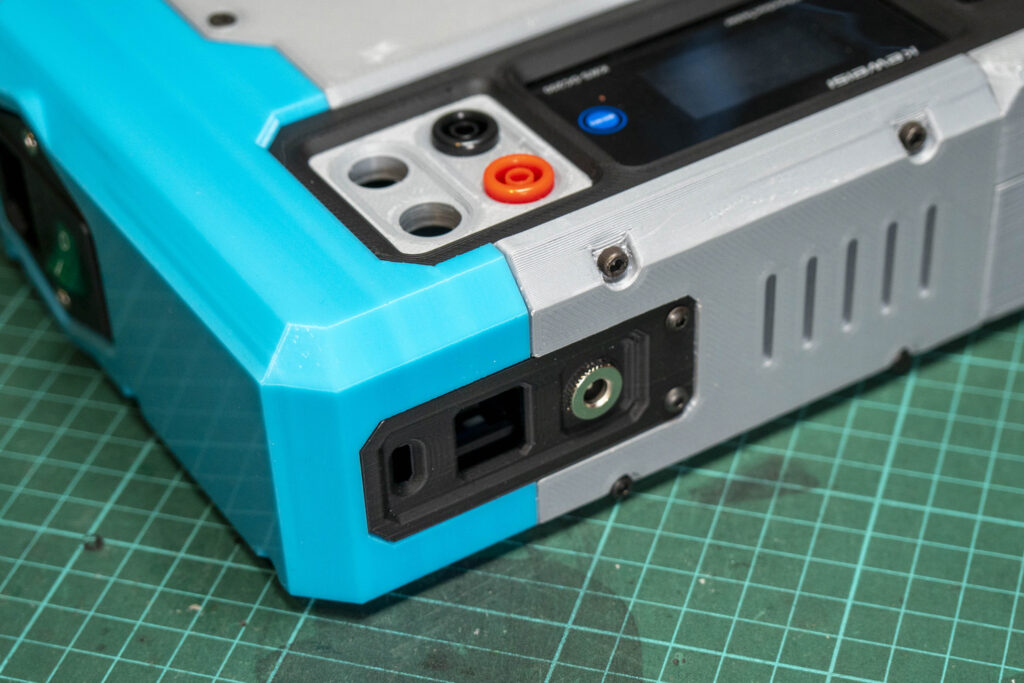
Initially, I intended to use a multi-port 140W PD charger and use a DC-to-PD adapter for the XTAR VP4 which needs 12V input. You can find more details about this adapter and how I selected the PD power supply in my previous post: Upgrade any Laptop with USB-C PD Charger.
Unfortunately, when I tested it by running all the chargers simultaneously, The VP4 didn’t seem to work well with the PD power supply. It randomly reset when I plugged in a battery into other chargers.
Updated AUG24: I’ve test this slim 175W USB-C PD charger and it’s work well with the setup. The charger efficiently powers multiple devices without any issues. To keep things tidy, I also designed a custom wall mount bracket for the charger, which helps reduce clutter and save space.
Note: If you’re using the XTAR VP4 charger with DC-to-PD adapter, be aware that it may reset when plugging in or unplugging other devices. This is a limitation of the DC-to-PD adapter, which briefly interrupts the power supply when a change in the load occurs.
Therefore, I decided to make a dedicated power supply for them. This will enable me to use a single power supply to power all the chargers. It will have multiple USB and PD outputs, plus a 12V output, and some extra ports for other uses.
It’s a work in progress and I’ll cover this in a future video, so if you’re interested, please subscribe and hit the bell for updates.
Anyway, if you’re using all chargers with USB ports. The multi-port PD power supply should work fine.
DISCLAIMER: This video and description contain affiliate links that support our channel. We are not responsible for any losses, damage, or injury in connection with the use of our content.
Let's Make Things!
Our blog is all about making practical and budget-friendly gadgets.
We will show you simple and cost-effective ideas to enhance the items around you to work better and make your life easier.
Choosing to fix and upgrade gadgets rather than replace them can contribute to reducing electronic waste, helping to save the Earth one device at a time.