ESPHome firmware
For the ESPHome firmware, I recommend starting with the essential components to test the basic functionality of your setup. Once everything works as expected, you can easily add additional features later through OTA updates.
I’ve provided the YAML configuration that I use, and you can download it for reference:
Board Configuration
For the ESP32-C3 Super Mini, I’ve use the default board configuration for ESP32-C3 and it work without any issues.
esp32:
  board: esp32-c3-devkitm-1
  framework:
    type: arduino
Reading AHT20 Sensors
To read the SOVOL internal environment data, you’ll need an I2C section for the onboard AHT20 sensor. Then add the AHT10 Sensor component, setting the variant to AHT20 for accurate readings.
i2c:
  scl: GPIO3
  sda: GPIO4
sensor:
  - platform: aht10
    variant: AHT20
    temperature:
      name: "Temperature"
    humidity:
      name: "Humidity"
Capacitive Spring Button Control
To simulate a button press, I use the Output Button component linked to the GPIO Output to drive each optocoupler. Each optocoupler requires one Output Button and one GPIO Output pair.
In the configuration, set the button’s duration to 0.2 seconds, which is enough to simulate a physical button pressed.
output:
  - platform: gpio
    pin: GPIOXX
    id: 'output1'
button:
  - platform: output
    name: "Power Button"
    output: output1
    duration: 0.2s
Add Condition to Mode and Setting Button (Optional)
The mode (M) and setting (A) buttons are inactive while the dryer is powered off, so disabling them in ESPHome can help prevent unnecessary operations. Additionally, these buttons can be disabled while the dryer is active to avoid accidental changes during operation.
Note: The dryer's physical buttons remain functional while it is active, but any changes made using them will not be synchronized with Home Assistant.
To implement this, you’ll need to expose the dryer’s status stored in Home Assistant helpers to ESPHome. If you haven’t already set up the helpers, check the Integrated with Home Assistant section for detailed.
Adding Home Assistant Helpers to ESPHome: To integrate Home Assistant helpers into ESPHome, you can use the text_sensor and binary_sensor components.
text_sensor:
  - platform: homeassistant
    name: "HA Screen Status"
    id: ha_screen_status
    entity_id: input_select.sovol_screen_status

binary_sensor:
  - platform: homeassistant
    name: "HA Power Status"
    id: ha_power_status
    entity_id: input_boolean.sovol_power

  - platform: homeassistant
    name: "HA Active Status"
    id: ha_active_status
    entity_id: input_boolean.sovol_active
Conditional Button Control: Instead of using the Output Button component, use the Template Button component to include conditions for triggering the GPIO outputs. Add a short delay of 0.2 seconds to simulate button presses.
button:
  # M Button only active when the dryer is "On" and dryer status is not active
  - platform: template
    name: "M"
    on_press:
      then:
        - if:
            condition:
              and:
                - binary_sensor.is_on: ha_power_status
                - binary_sensor.is_off: ha_active_status
            then:
              - output.turn_on: output2
              - delay: 0.2s
              - output.turn_off: output2

  # A Button only active when the dryer status is not active and "screen status" is not "Info"
  - platform: template
    name: "A"
    on_press:
      then:
        - if:
            condition:
              and:
                - binary_sensor.is_off: ha_active_status
                - not:
                    text_sensor.state:
                      id: ha_screen_status
                      state: 'Info'
            then:
              - output.turn_on: output3
              - delay: 0.2s
              - output.turn_off: output3
Detect Physical Touch
For detecting a physical press from the touch IC, I configure a GPIO binary sensor component. Apply an invert filter to reverse the status in Home Assistant since the default output for the pin is high, and it drops to low when a touch is detected.
binary_sensor:
  - platform: gpio
    pin:
      number: GPIOYY
    name: "Power Touch"
    filters:
      - invert:
Flashing the Firmware
Once your configuration is complete, you can flash the firmware to the ESP32-C3 module using ESPHome as you normally would. Personally, I find it convenient to compile the firmware in Home Assistant and then use the ESPHome web tool for flashing.
Note: Some modules may require holding the boot button while connecting the device to your computer, while others might not. I found this inconsistency in the same batch of ESP32-C3 modules I purchased.
Integrated to Home Assistant
Since there’s no direct way to retrieve the dryer’s current settings, I’ve developed a system using Home Assistant helpers and automations to track and store its status based on button presses. This method enables seamless control of the dryer through Home Assistant while maintaining accurate status tracking.
How the Automation Works
When the dryer is first plugged in, it starts in an “off” state where none of the buttons function except for the power button. The Sovol Toggle Power automation continuously monitors power button activity and updates the Power Status input boolean accordingly. If the dryer is turned off, the automation triggers a reset script that reverts all helper values to their default states.
The Sovol M Button and Sovol A Button automations handle the corresponding button presses tracked in Home Assistant.
- M Button Automation:
Pressing the M button cycles through the options in the Screen Status input select. The options loop from “Info” to “Temperature” to “Time,” and back to “Info.” When it returns to “Info,” the dryer will start working, the automation will run “Sovol Start Active”. This will turn on Active Status helper, starting the timer, and triggering any related actions. - A Button Automation:
When the screen is in Temperature or Time mode, pressing the A button adjusts the corresponding setting. For instance, if the dryer is in Temperature mode, pressing the A button advances to the next available temperature option in the Sovol Set Temperature helper.
Essential Components
To manage the dryer effectively, I’ve included basic components in the configuration. All related entities, automations, and scripts are prefixed with “Sovol” for easy organization and navigation.
Helpers
- Input Boolean:
- Sovol Power: Tracks the control board’s power status, toggled by a binary sensor.
- Sovol Active: Tracks whether the control board is in an active working state.
- Input Select:
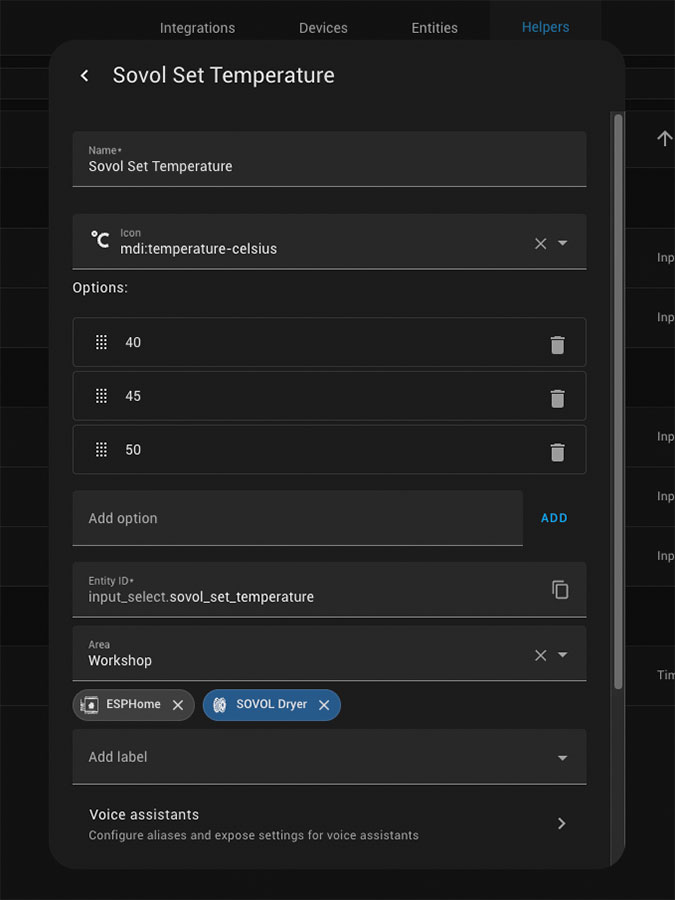
- Sovol Set Temperature: Stores the temperature setting, with options for 40°C, 45°C, and 50°C.
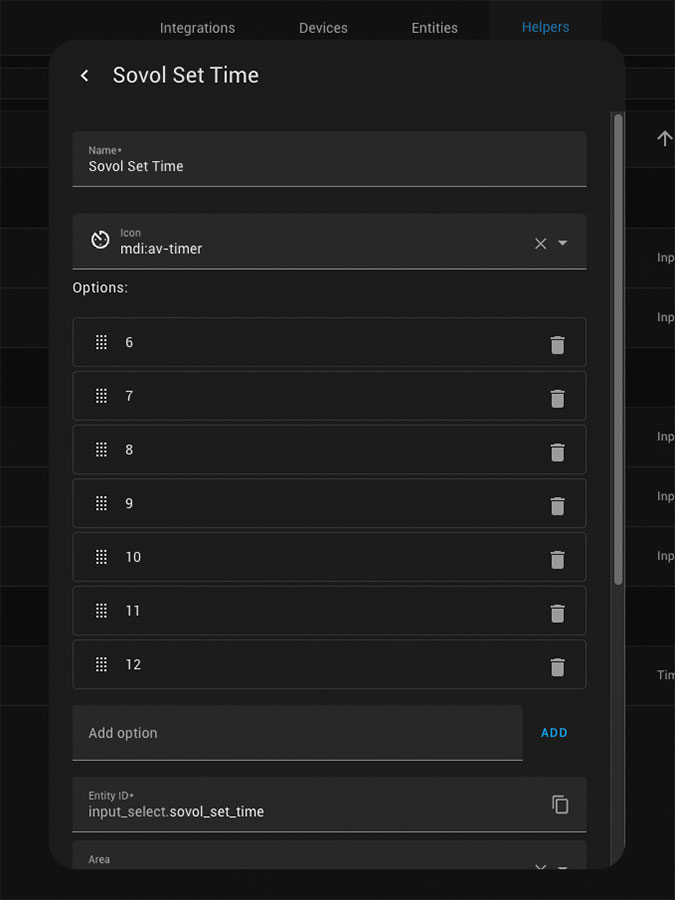
- Sovol Set Time: Stores the drying time setting, ranging from 6 to 12 hours.
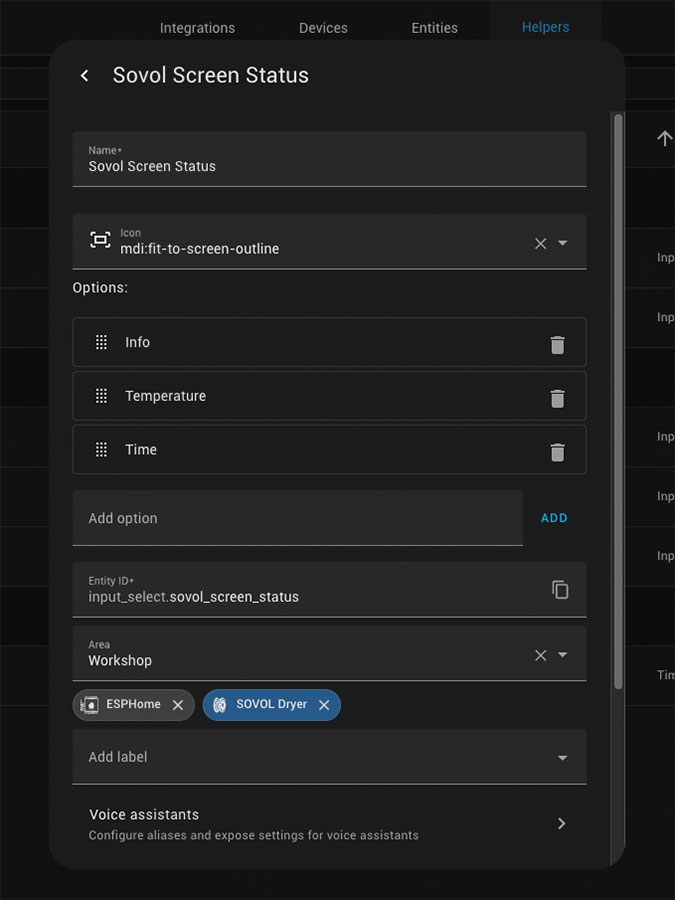
- Sovol Screen Status: Tracks the current screen display state (Info, Temperature, or Time).
- Time:
- Sovol Timer: Displays the remaining drying time after activation.
- Input Datetime:
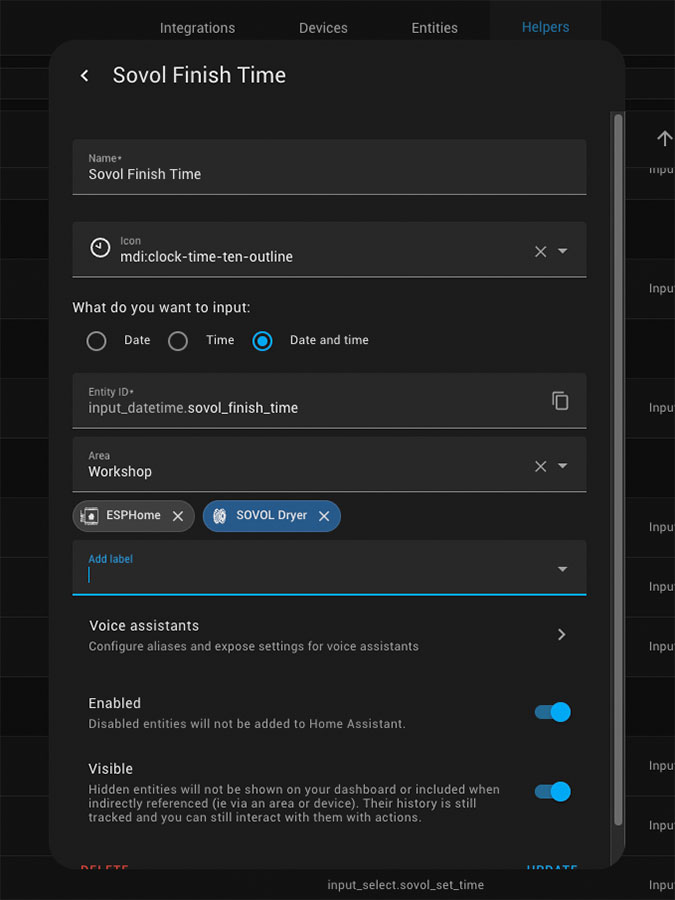
- Sovol Finish Time: Stores the calculated finish time for the current drying session.
Automation
- Sovol Toggle Power:
Monitors power button activity, whether from a physical press or a virtual button in Home Assistant, using signals from the binary sensor. And if turned off, run a reset script to reset all helper values to their starting defaults. - Sovol M Button:
Updates the Screen Status helper to the next option when the M button is pressed. If the status changes from Time to Info, it triggers the Start Active script. - Sovol A Button:
Adjusts the Temperature or Time helper based on the current Screen Status when the A button is pressed. - Sovol Timer Finish:
Additional automation to do some actions when the timer ends.
Script:
- Sovol Reset Status:
Resets all helpers to their default values. - Sovol Start Active:
Activates the Active Status, calculates the estimated finish time, and starts the timer.
Automation for Synchronizing Dryer Status
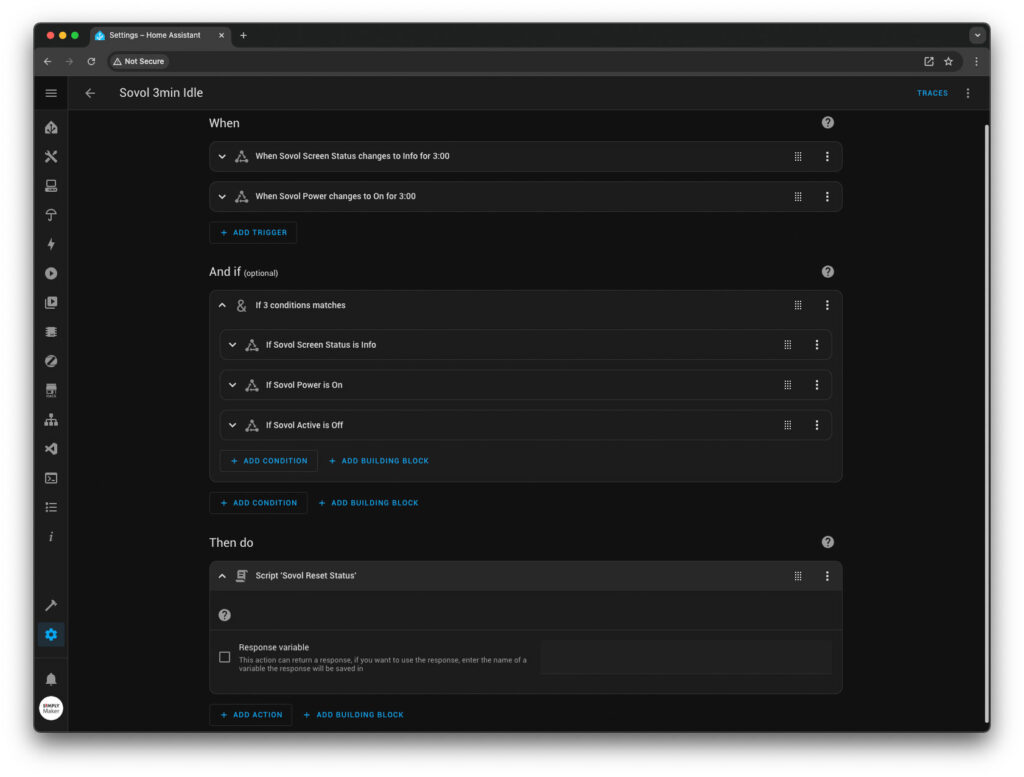
The SOVOL Dryer has built-in features to automatically power off after 3 minutes of inactivity, as well as revert to the “Info” screen in settings mode if there is no user interaction within 5 seconds. You can create automations in Home Assistant to track these behaviors and update the dryer’s status, ensuring everything is accurately reflected on your dashboard.
- Sovol 3min Idle:
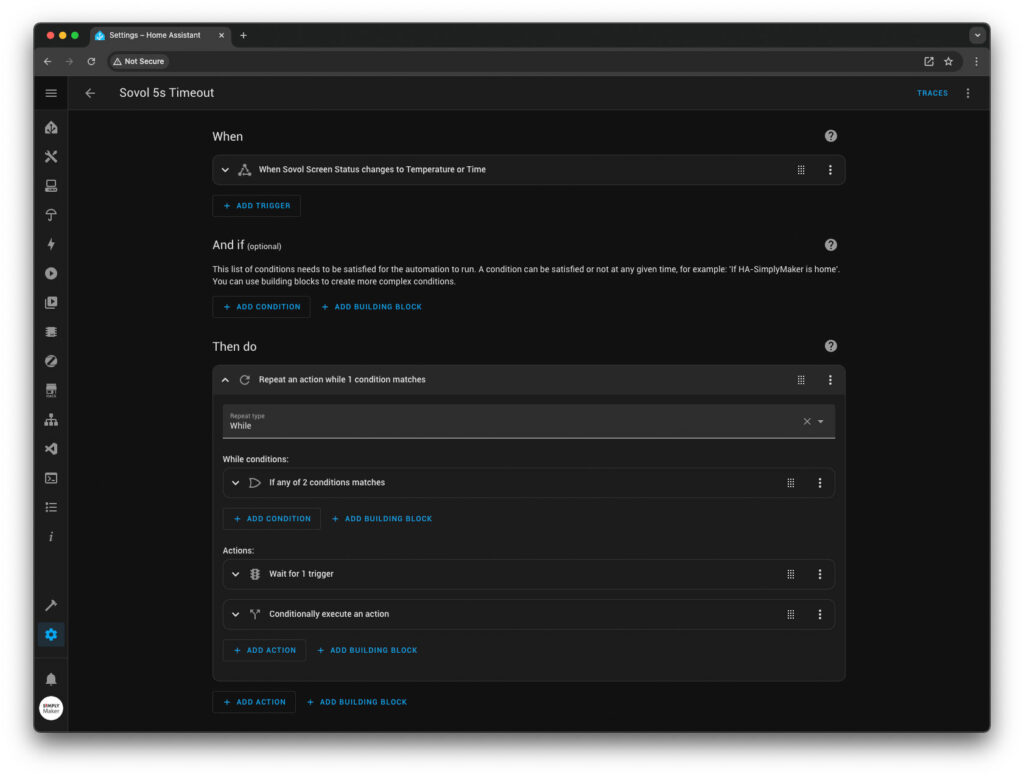
This automation will activate the reset script if the dryer remains idle for 3 minutes, which the dryer will automatically turn off by its idle function. The script will reset all the helpers including turn off the Sovol Power helper which show in the dashboard. - Sovol 5s Timeout:
This automation monitors button activity in the setting menu. If no interaction occurs within 5 seconds, the display will revert to the “Info” screen. The behavior depends on which screen the dryer is on when the timeout happens:- In the Temperature page, any unsaved settings will be discarded, and the screen will automatically return to the “Info” page (even if the A button is pressed before the timeout). Settings will only be saved if the M button is pressed, which transitions the screen to the Time page.
- In the Time page, if no A button press occurs before the timeout, the dryer will return to the “Info” page, while retaining the previously saved temperature setting.
However, if the A button is pressed before the timeout occurs, the dryer will start working with the timer set to 6 hours.
Note I can not find the way to detect the A button press in time page so if the A button press and toggle back to 6 hours and the timeout occur, the dryer will start working but not show as active in the dashboard.
Additional Features
Runtime Counter
This feature lets you track and display the dryer’s runtime directly on your Home Assistant dashboard.
Helper
- Sovol Run Time:
This is aninput_numberhelper used to store the runtime. It must be reset using the Sovol Reset Status script after each drying cycle.
input_number:
  # Runtime counter for tracking total drying time.
  # Use minute-based (max: 720 for 12 hours) or second-based (max: 43200 for 12 hours).
  sovol_run_time:
    name: Sovol Run Time
    icon: mdi:counter
    initial: 1
    min: 1
    max: 720
    step: 1
- Sovol Run Time Display:
A template sensor to convert the runtime into a readable format of hours and minutes for display in the dashboard.
template:
  # Display runtime in hours and minutes
  - sensor:
      - name: "Sovol Runtime Display"
        icon: mdi:progress-clock
        state: >
          {% set time = states('input_number.sovol_run_time') | int %}
          {% set minutes = (time % 60) | int %}
          {% set hours = (time / 60) | int %}
          {{ '{:02}:{:02}'.format(hours, minutes) }}
If you’d like to display the runtime in hours, minutes, and seconds, use this template instead:
state: >
  {% set time = states('input_number.sovol_run_time') | int %}
  {% set seconds = (time % 60) %}
  {% set minutes = ((time / 60) % 60) | int %}
  {% set hours = (time / 3600) | int %}
  {{ '{:02}:{:02}:{:02}'.format(hours, minutes, seconds) }}
Automation
- Sovol Run Time Trigger:
This automation increments the Sovol Run Time input number. It’s triggered using thetime_patternplatform and is configured to update every minute. While you can set it to trigger every second for more accuracy, this may create unnecessary system load.
This automation should be disable by default. You need to enable it by Sovol Start Active script and disabled through the Sovol Reset Status script.
automation:
  - alias: "Sovol Run Time Trigger"
    trigger:
      - platform: time_pattern
        minutes: "/1"
    action:
      - service: input_number.increment
        target:
          entity_id: input_number.sovol_run_time
Note: When using the minute-based trigger, note that the automation will execute at the first second of every new minute. This may cause a slight desynchronization with the dryer’s internal timer. For instance, if you set a drying time of 6 hours and start the dryer at 10:00:31 AM, the counter will display00:01when the dryer has actually only been running for 29 seconds. The timer itself will, however, display the correct countdown (e.g.,5:59:31).
Custom Timer
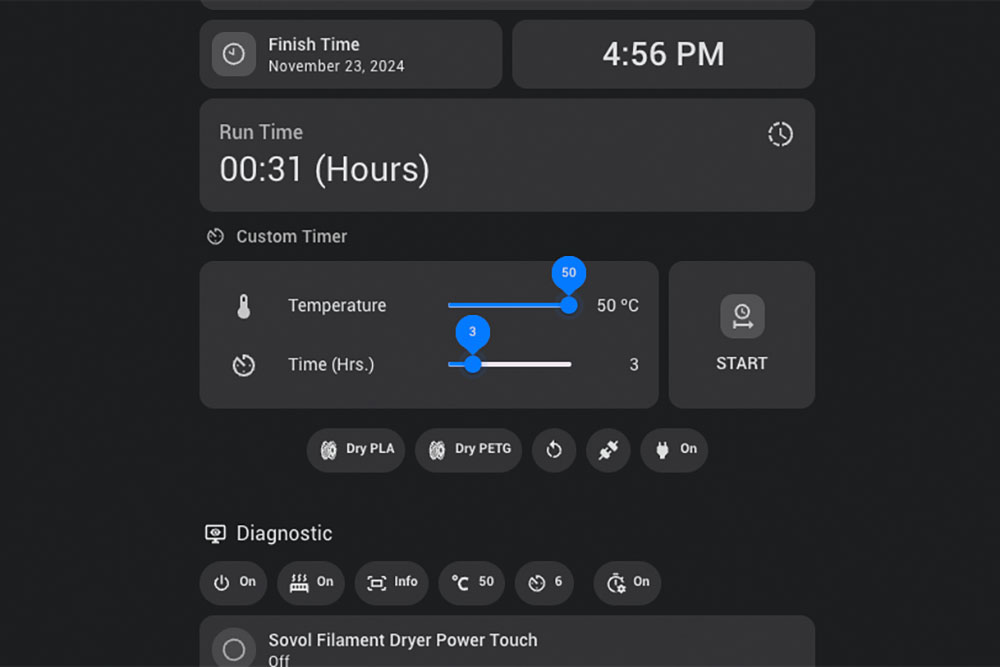
The Sovol Filament Dryer comes with a minimum timer limit of 6 hours, which might not be ideal for certain drying tasks. With the addition of a Custom Timer, you can set the drying time to less than 6 hours, offering more flexibility. Additionally, I found starting the dryer via this method more convenient than pressing buttons sequentially. However, this feature requires additional helpers.
Helper
- Input Boolean:
- Sovol Custom Time Active: This helper toggles the custom timer function on or off and use in “Start Active” script condition to display the custom time in Home Assistant dashboard.
- Input Number:
- Sovol Custom Temp: Stores the custom temperature setting. Set the range from 40 to 50 (step size: 5).
- Sovol Custom Time: Stores the custom time setting. Set the range from 1 to 12 hours (step size: 1).
Script
- Sovol Custom Time: Script to sequentially presses buttons on the dryer to set the custom time and temperature.
To use this feature, you’ll need to add a condition to the “Start Active” script so it uses the custom time data when starting the custom timer.
Important Notes: If the custom time is less than 6 hours, the dryer's display will still show 6 hours as it counts down. However, the custom time will display accurately in the Home Assistant dashboard. The dryer will stop by the Sovol Timer Finish automation when it reached setting custom time.
Dryer Preset
If you’d like you can also create drying presets for each type of filament you use. This can be done by creating a script that simulates the button presses in a specific sequence, similar to the Custom Timer. This way, you can start the drying process with just a single click.
Just make sure to include a short delay between each press to ensure the buttons are triggered properly. In my case, a 400 ms delay worked perfectly.
Additionally, I recommend to add an action to power cycling the control board before running any automated operations. Since physical presses for the two setting buttons aren’t tracked, there’s a chance for settings to go out of sync. Reset all the helper can ensure that the automation will run correctly.
Ready-to-Use YAML Files
I’ve put all the helpers, automations, and scripts discussed here into two YAML files, one for essential functions needed to control the dryer and another optional file for extra features. So you can easily add them to the Home Assistant packages folder.
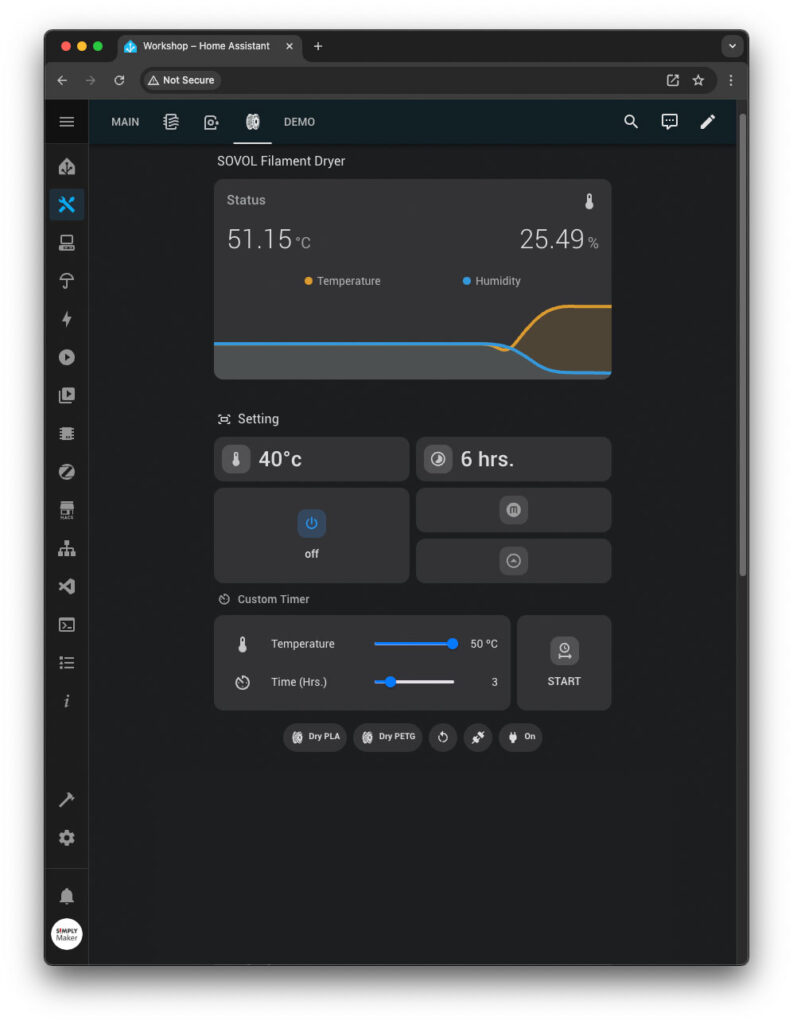
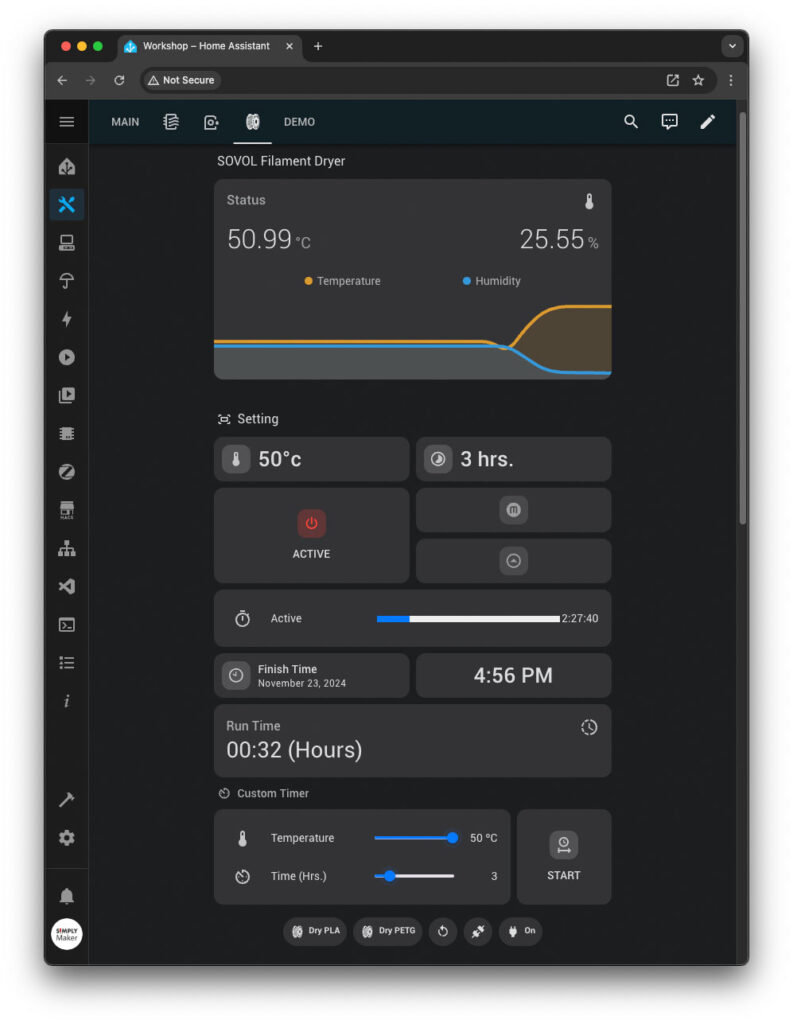
Additionally, I’ve included a YAML configuration for the dashboard I’ve created for the dryer, with some conditional logic to make the interface more user-friendly.
Known Issues and Potential Improvements
Despite the upgrades significantly enhance the dryer’s functionality, there are still some limitations and opportunities for further enhancement.
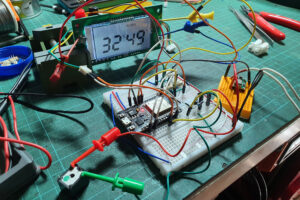
One notable limitation is that the setting buttons don’t physical presses due to limited space inside the dryer. Initially, I managed by resetting the settings through power cycling the control board before starting the automation process. While this workaround works, but over time, I realised having this feature would make things even better.
This could be fix by use a larger ESP32S module with touch GPIO pin. So I can detect physical press without messing with the touch IC. But it’s need to be mounted outside the dryer.
However, it will offers more flexibility with the extra space. I could add more features like a relay for direct control of the board without power off the ESP module, an additional AHT sensor for monitoring external conditions, or even a cooling fan. Moreover, moving the ESP module outside the dryer would protect it from heat exposure, potentially improving stability and reduce temperature-related issues.
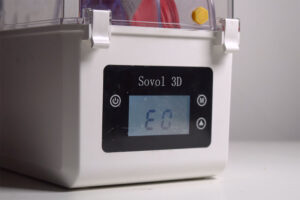
Another issue I’ve encountered is the occasional E0 error on the control board. The cause of this error is still unclear, as it occurs randomly. The dryer often operates flawlessly for days, while at other times, the error appears after just a few hours. When it happens, the dryer briefly displays a warning and emits a sound, before resuming normal operation. However, in some cases, I’ve had to power cycle the control board to clear the warning.
I use the dryer with an LDNIO power strip I flashed with ESPHome firmware that I flashed with ESPHome firmware in a previous video. So I can create a script and add the button to the dashboard for easy power cycling.
Conclusion
Overall, I’m pretty satisfied with this hack. It’s so much more convenient to control and monitor the dryer wirelessly. Setting it up with drying presets or a custom timer is very convenience with one click. Plus, the added benefits of knowing the estimated finish time and runtime are really handy.
Another great advantage of this upgrade is that it works with the original control board, so there’s no need to replace the PCB or reverse-engineer the system. This not only saves time and effort but also makes it possible to revert the dryer to its original state anytime if needed.
I’m currently working on a solution to neatly mount a larger ESP32S module outside the dryer. By mounting the module externally, the ESP module won’t be exposed to the dryer’s heat, which might be a cause of the E0 error. Once the new setup is complete, I’ll put it to the test to see if this resolves the issue while also opening up possibilities for future upgrades.
Let us know how these modifications worked for you or if you’ve come up with any other creative upgrades! Happy printing!
This content is intended to share ideas and inspire DIY projects. While we’ve taken care to ensure accuracy, we are not liable for any losses, damages, or injuries that may occur from following these instructions or using the information provided. Please proceed with caution, and always follow safety guidelines when working on your projects.
Disclaimer


