Introduction
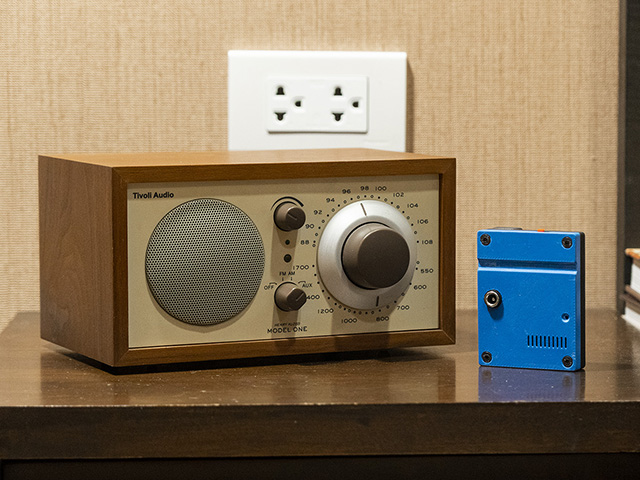
A small DC relay box that lets you remotely turn a device’s power on and off using an ESP32 or another microcontroller.
I originally designed this for my fiber optic ONU (Optical Network Unit). Occasionally, the ONU needs a restart to get my internet connection working again. Since it’s installed in a location that’s not very convenient to access, I wanted a way to remotely restart it without having to physically unplug and reconnect the power cable.
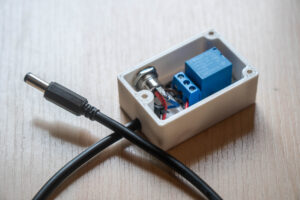
I already have an ESP32 installed nearby, so adding a relay to my existing setup seemed like a simpler solution than installing another smart plug. However, connecting a relay module directly can get messy, especially with all the power, output, and control wires.
So I designed this compact enclosure to keep everything organized and make the relay easier to install, remove, or move between different devices. It simply connects to an existing ESP32, allowing me to control the device’s power remotely through ESPHome and Home Assistant.
The design is simple, inexpensive, and can be used with more than just network equipment. You can use it with almost any low-voltage DC device that needs an occasional power reset.
Hardware Used

Electronics
- Single Channel 5V Relay (KY-019): Aliexpress
- 5.5×2.1 DC Barrel Socket: Aliexpress
- 5.5×2.1 DC Barrel Jack: Aliexpress
- 2 Core VCT wire (Max Diameter 5mm): Aliexpress
- Any ESP32 or ESP8266: Aliexpress
Note: Many 12V devices use a 5.5 × 2.1mm DC barrel connector, but don't assume they are all the same. Check your device's connector size and polarity before ordering or connecting anything.
Hardware
- M3x8 Screws @3: Aliexpress
- M2x6 Self-tap Screws @4: Aliexpress
3D Print Parts
- Printables.com: Compact Single DC Relay Box
- Thingiverse: Compact Single DC Relay Box
Wiring Diagram
The wiring is straightforward. The DC input from the power supply connects to the relay’s COM terminal, while the NC terminal connects to the positive output going to the ONU.
The negative wire bypasses the relay and connects directly from the DC input to the DC output.
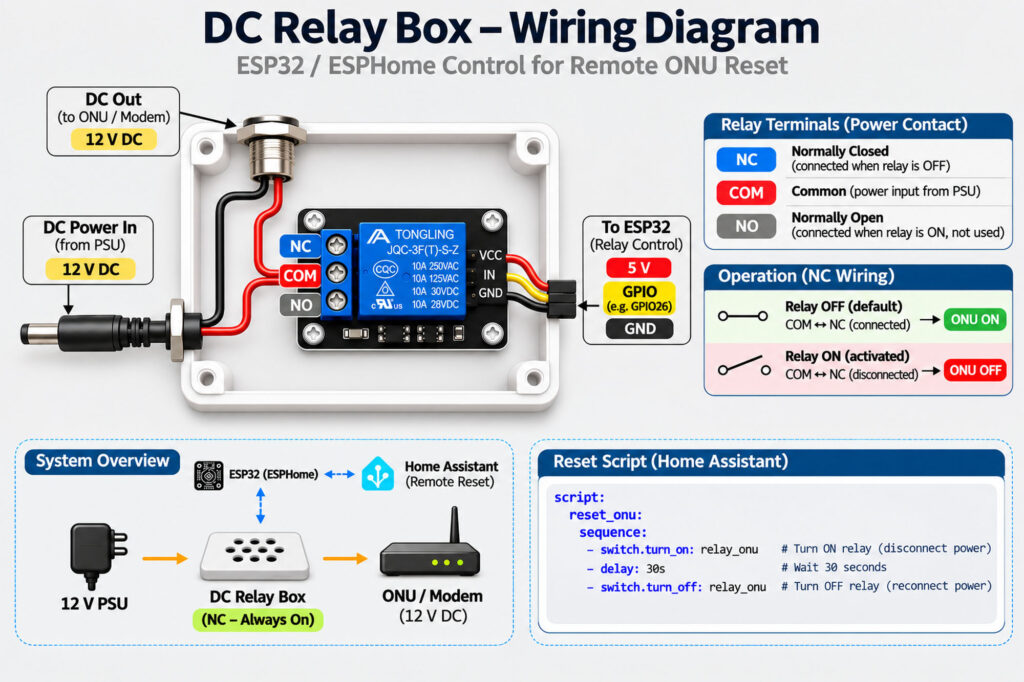
Why Use Normally Closed (NC)?
There are two ways to wire the relay: Normally Open (NO) or Normally Closed (NC).
For this project, I chose NC because I want the ONU to remain powered by default.
- Relay OFF (default): COM and NC are connected, so the ONU receives power.
- Relay ON (activated): COM and NC are disconnected, cutting power to the ONU.
This arrangement means the relay doesn’t need to be energized continuously to keep the ONU running. If the ESP32 loses power or the control signal disappears, the relay returns to its default NC state and restores power to the ONU.
It’s a simple way to make the system more reliable for network equipment that needs to stay online.
ESPHome and Home Assistant Integration
I already have an ESP32 running ESPHome to control my power supply, so I can simply add a GPIO switch to my existing ESPHome configuration and connect the relay’s signal pin to a GPIO pin.
ESPHome configuration:
switch:
  - platform: gpio
    id: modem_switch
    inverted: true
    name: modem switch
    pin: GPIO0
    restore_mode: ALWAYS_OFF
A couple of notes about the configuration:
inverted: trueis required for my relay module because its input is active-low.restore_mode: ALWAYS_OFFensures the relay is de-energized when the ESP32 boots, keeping the ONU powered through the NC contact.
Once the ESPHome device is connected to Home Assistant, the relay will appear as a normal switch entity. You can simply add it to your dashboard to control the relay directly.
However, I prefer using a dashboard button to run a script instead. This way, I can turn off the ONU, wait for 30 seconds, and automatically turn it back on without having to toggle the switch manually.
tap_action:
  action: toggle
  confirmation:
    text: Restart Modem?
icon_tap_action:
  action: more-info
I’d recommend setting the switch’s dashboard tap action to More Info or enabling a confirmation dialog to prevent accidentally cutting off the ONU’s power.
Home Assistant Script:
The script does three things:
- Turn ON the relay to disconnect the power.
- Wait for 30 seconds.
- Turn OFF the relay to restore power.
script:
  reboot_modem:
    alias: Reboot Modem
    sequence:
      - action: switch.turn_on
        target:
          entity_id: switch.psu_control_modem_switch
      - delay: "00:00:30"
      - action: switch.turn_off
        target:
          entity_id: switch.psu_control_modem_switch
Now I can restart the ONU with a single click from my Home Assistant dashboard, without having to physically access the device.
Final Thoughts
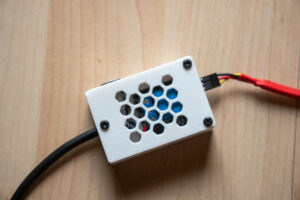
This is a simple little DIY project, but very useful for remotely managing network equipment. It solves a small annoyance in my home network setup.
I like having control over my network equipment through Home Assistant, and being able to remotely power-cycle the ONU with a single click is a useful addition. No more walking over to the network cabinet just to unplug and reconnect a power cable!
The same design can also be used with routers, modems, small network switches, or other low-voltage DC devices that occasionally need a power reset.
Important notes
- Designed for low-voltage DC applications.
- Check your device’s voltage, polarity, and current requirements before connecting.
- Make sure the relay contacts and wiring are rated for your load.
- The relay module requires a suitable 5V supply and a compatible control signal.
- This enclosure is not designed for AC mains voltage.
Some links may contain Aliexpress affiliate links. This means if you make a purchase through them, I’ll earn a small commission at no additional cost to you.
I also buy from these suppliers myself, so I’m confident in recommending them. If you’re comfortable shopping on AliExpress and enjoy my projects, feel free to use these links! Your support helps fund the channel, allowing me to create even more exciting DIY content for you.
Thank you!